Quick Start
This guide walks you through creating your first form with Forms Plugin. By the end, you’ll have a working form component placed on your Framer canvas, ready to customize.
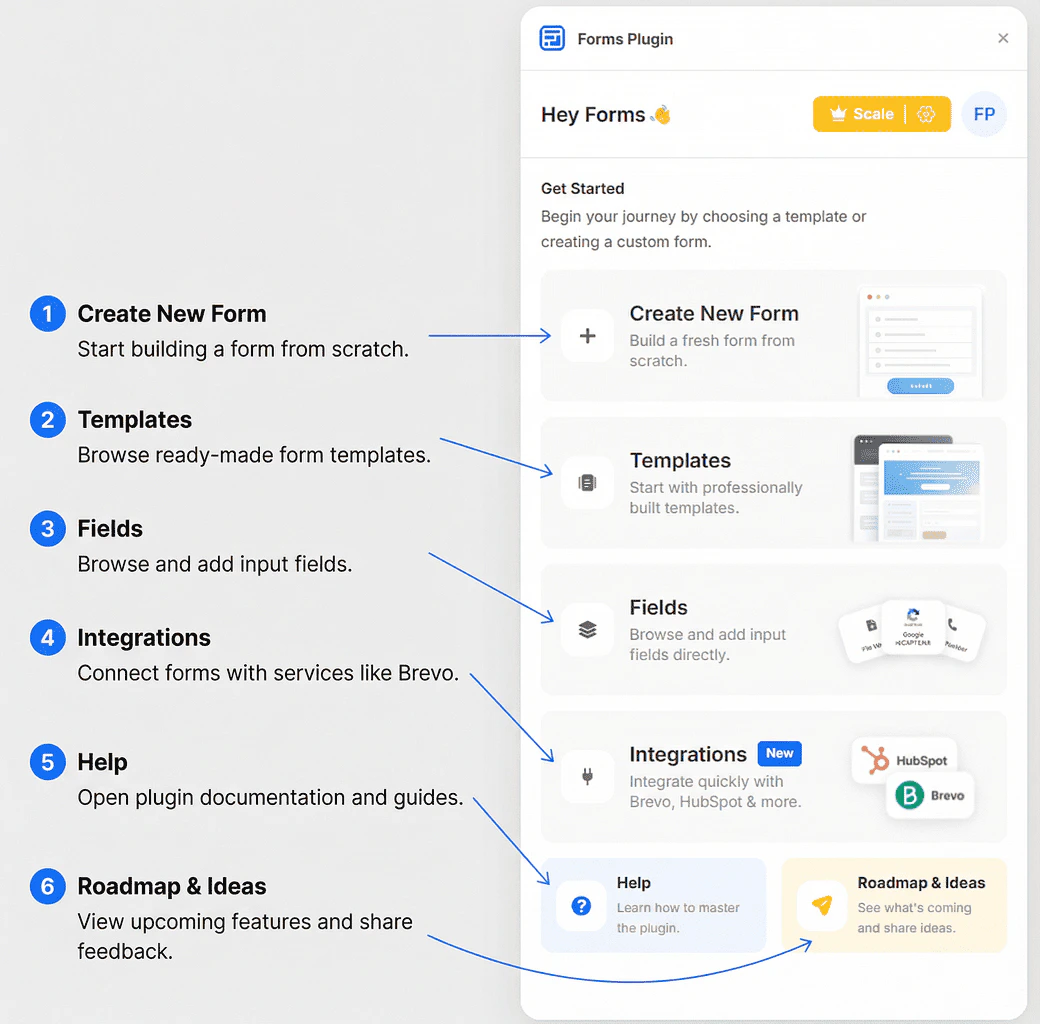
The Home Screen
When you open Forms Plugin, you land on the home screen. This is your starting point for everything in the plugin.
The Get Started section contains six actions:
| Action | What it does |
|---|
| Create New Form | Build a form from scratch |
| Templates | Browse the form template library |
| Fields | Explore available field types |
| Integrations | Connect to third-party tools |
| Help | Access documentation and support |
| Roadmap & Ideas | View upcoming features and share feedback |
- On the home screen, click Create New Form
- A
single-step-form component is inserted directly onto your Framer canvas
- The form is now selected in the canvas - you can resize and reposition it like any other Framer element
- Use the Fields section in the plugin to browse and add field types to your form
Start with a blank form when you need full control over every field and layout. This is the best option for custom designs.
Option B: Start from a Template
Templates let you skip the setup and launch with a professionally designed form:
- On the home screen, click Templates
- Browse the form template library - use the search bar to filter by name
- Click a template card to see a preview
- Click Insert Template to add it directly to your canvas
Some templates are marked with a Pro or Scale badge, which means they require a paid plan to insert. See Plans & Pricing for details.
Once a form is on the canvas:
- Click Fields on the home screen (or from the plugin navigation)
- Browse the Basic, Advanced, or CAPTCHA tabs
- Click a field to add it to your form
See Form Fields for a full overview of the Fields page.
Next Steps