File Upload
The File Upload field lets you collect files directly from your form submissions. Whether you need resumes, documents, images, or any other file type - users can attach and submit them right from your form.How File Upload Works
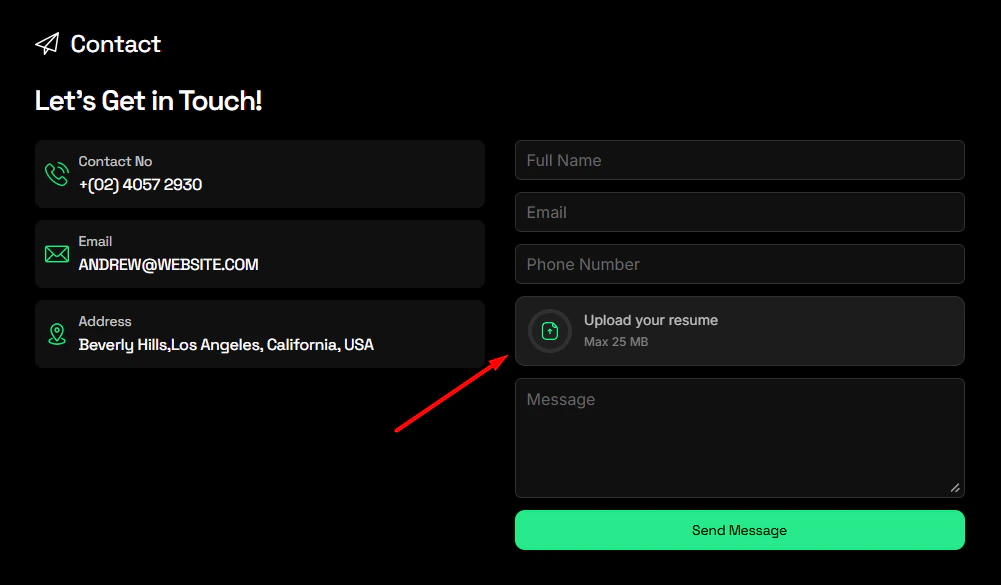
Here is a step-by-step breakdown of the entire file upload process - from setting up the field to receiving the uploaded file.Step 1: Add the File Upload Field to Your Form
- Open Forms Plugin in your Framer project
- Navigate to the Fields section
- Select the Advanced tab
- Click File Upload to add it to your form
Step 2: Configure the Upload Field
Once the field is added, you can customize it to match your needs:- Label - Set a clear label so users know what file to upload (e.g., “Upload your resume”, “Attach a document”)
- Accepted File Types - Restrict which file formats are allowed (e.g., PDFs only, images only, or a mix)
- Required / Optional - Mark the field as required if a file must be attached before submitting
Step 3: User Fills Out and Submits the Form
When a visitor lands on your page and fills out the form:- They click the upload area or browse button on the file upload field
- A file picker opens where they select a file from their device
- The selected file name appears in the field, confirming it is attached
- They complete the rest of the form and click Submit
Step 4: You Receive an Email with the File Link
After a successful submission, you (the form owner) will receive a notification email containing all the submitted form data. Inside the email, you will find:- All the field responses (name, email, message, etc.)
- A direct link to the uploaded file
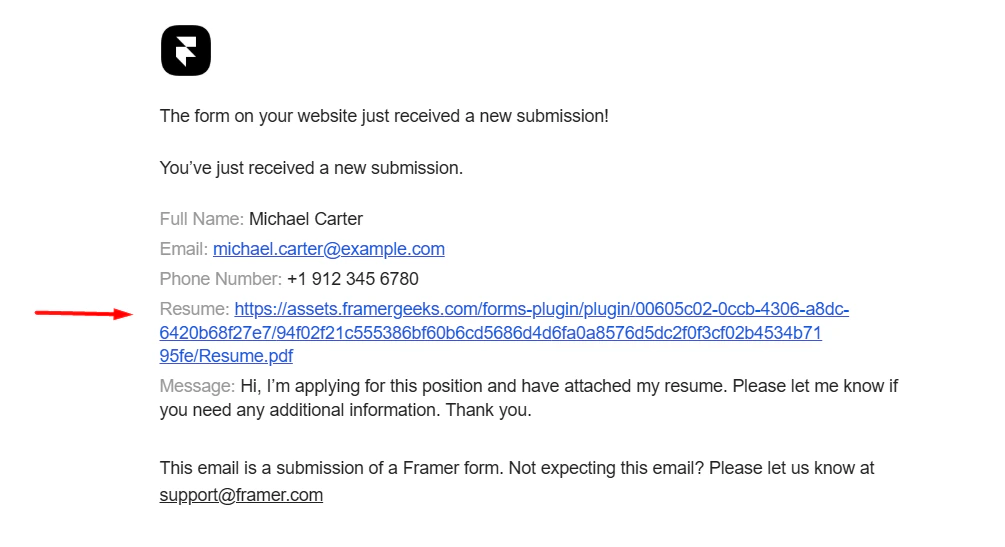
The file link in the email takes you directly to the app where the uploaded file is hosted. From there, you can preview the file and download it to your device.
Step 5: View and Download the File
When you click the file link from the email:- The file opens in the Forms Plugin app
- You can preview the file directly in the browser
- Click Download to save it to your device
Supported Upload Field Types
Forms Plugin offers four types of upload fields, each scoped to a specific category:| Upload Field | Accepted Files | Best For |
|---|---|---|
| File Upload | Any file type (PDF, DOCX, ZIP, etc.) | Documents, resumes, contracts, general files |
| Image Upload | Image files (PNG, JPG, GIF, WEBP, etc.) | Photos, screenshots, design files |
| Audio Upload | Audio files (MP3, WAV, OGG, etc.) | Voice samples, music, podcasts |
| Video Upload | Video files (MP4, MOV, WEBM, etc.) | Video testimonials, demos, recordings |
Common Use Cases
- Job Application Forms - Collect resumes and cover letters as PDF or DOCX attachments
- Contact Forms - Let users attach screenshots or documents to explain their issue
- Client Onboarding - Gather contracts, ID documents, or brand assets from new clients
- Feedback Forms - Accept image or video evidence alongside written feedback
- Creative Submissions - Collect portfolio samples, audio demos, or video entries
Things to Keep in Mind
- File size limits may apply depending on your plan. Check Plans & Pricing for details.
- Uploaded files are stored securely and are accessible through the link provided in the email notification.
- Each form submission can include one file per upload field. If you need multiple files, add multiple upload fields to your form.
- Make sure to set the field as required if a file attachment is mandatory for the submission.
Next Steps
- Advanced Fields - Explore all available advanced field types
- Form Fields - Learn how to add and manage fields in your forms
- Submission History - View all past submissions and uploaded files
- Plans & Pricing - Check which plan includes file uploads